The measure process follows the PDCA logic as standard, but can also be adapted to your needs. This page ties in with previous content on Processing of measures .
1 - QR code link, measure log and measure process attachments
Scanning the QR code provides direct access to the measure process. Alternatively, the link below can be copied and sent.
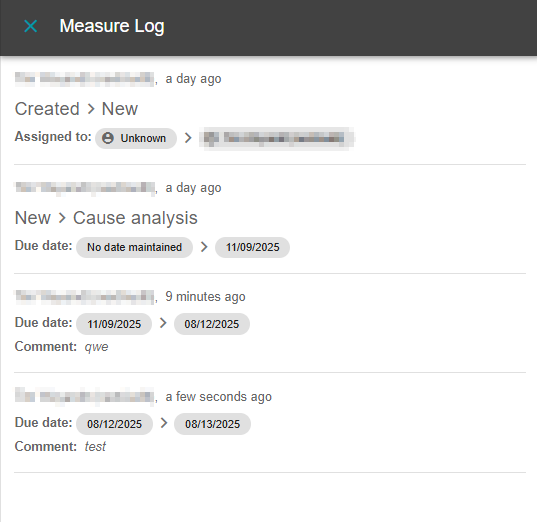
Every step is recorded and logged in the measure log. This allows you to check who made which changes or edits and when:
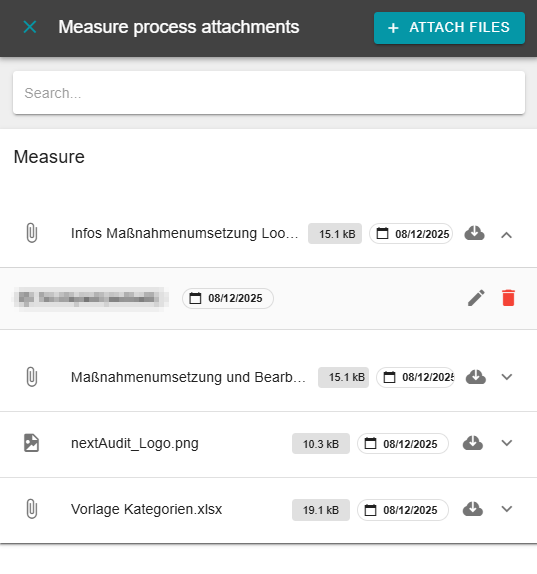
All attachments are listed together in the measure process attachments. All attachments can be downloaded using the cloud to the right of the upload date. Clicking on the file opens another bar where the uploader can be seen. There, the file can also be deleted or commented on.
The “Attach files” button allows you to add further data.
2 - Measure responsible
Here you can assign the person responsible for the corresponding measure. This will then be displayed in the measure processing
10 - Person responsible for the measure . You can only assign one person to a measure.
3 - Change due date
The date by which the measure must be processed can be changed here. As explained under
9 - Due date of a measure , this will then be highlighted in the corresponding colour.
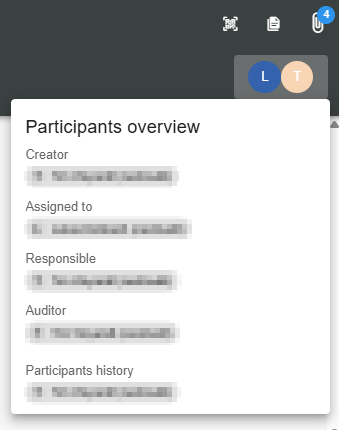
4 - Display participants overview
Clicking on the icon below the measure log opens an overview of all persons involved in the measure. These include, for example, the creator, the auditor and the measure responsible:
5 - Change language
As you already know from many areas of AuditCloud, you can also switch between German and English here.
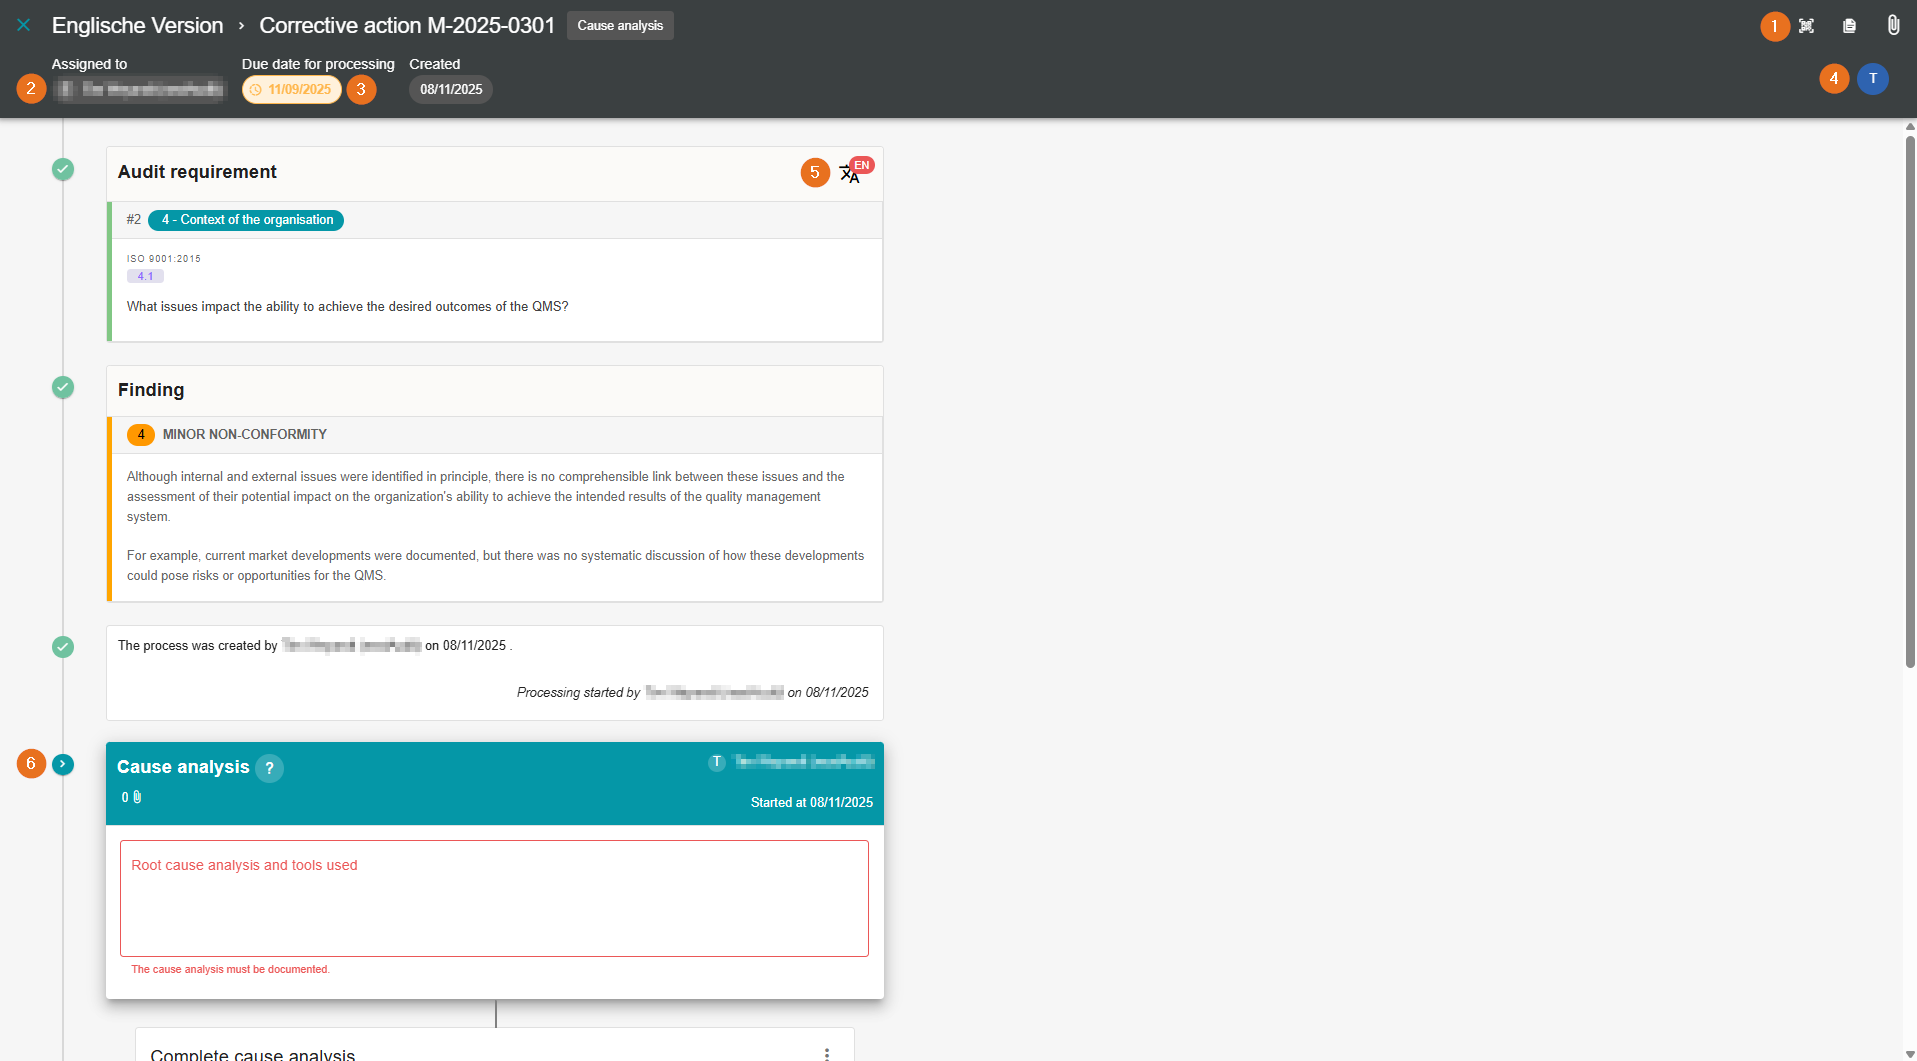
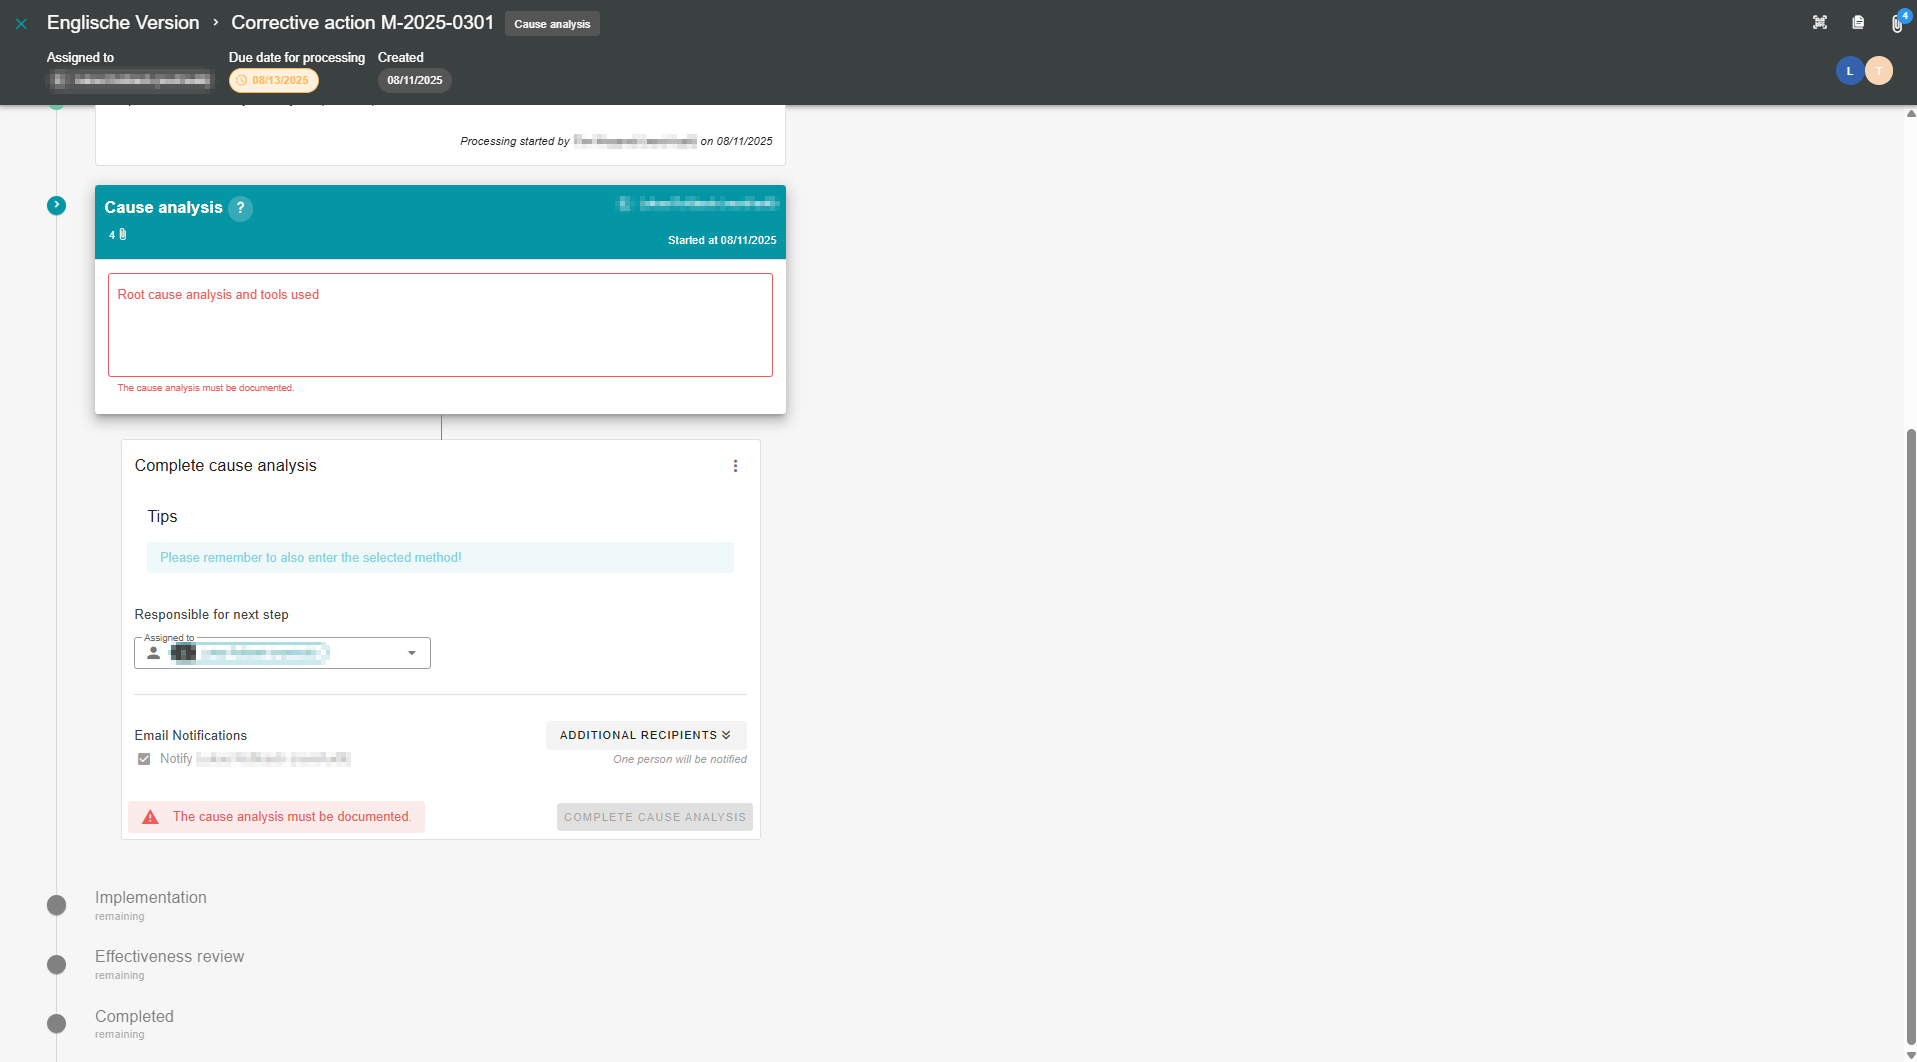
6 - Running through the measure process
If you scroll down, you will see the next steps in the measure process. You can see which steps are still pending and who is currently performing them:
You can also see the current status of the corresponding measure in the measure implementation dashboard. For more information, open Processing of measures .
By default, a corrective action requires a root cause analysis, implementation, and effectiveness review. A preventive action includes a proposal (whether implementation should be rejected or started), implementation, and an effectiveness check, while an immediate action only includes implementation and the effectiveness check.
Upon request, existing measures as well as completely new measures can be configured. The workflow of the measures (the steps the measure goes through) is also customisable.
In general, each step is assigned a free text field in which information can be recorded. Emails are sent automatically after a step is completed. Additional recipients can also be notified:
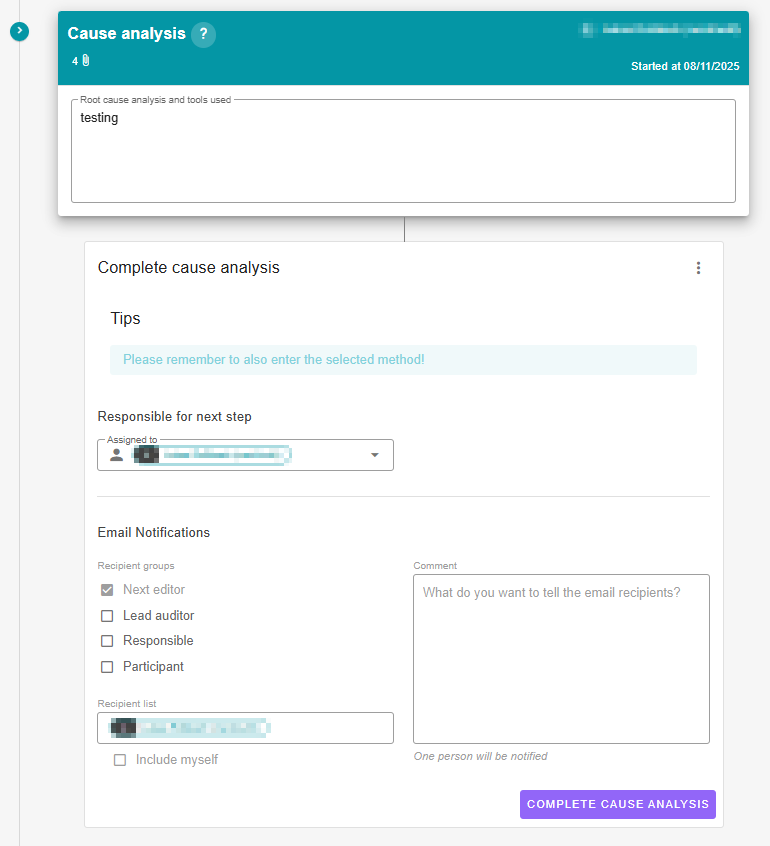
Clicking on "Complete..." completes the respective step. As mentioned above, each step can be customised individually, for example, the email notifications or the type of text field.