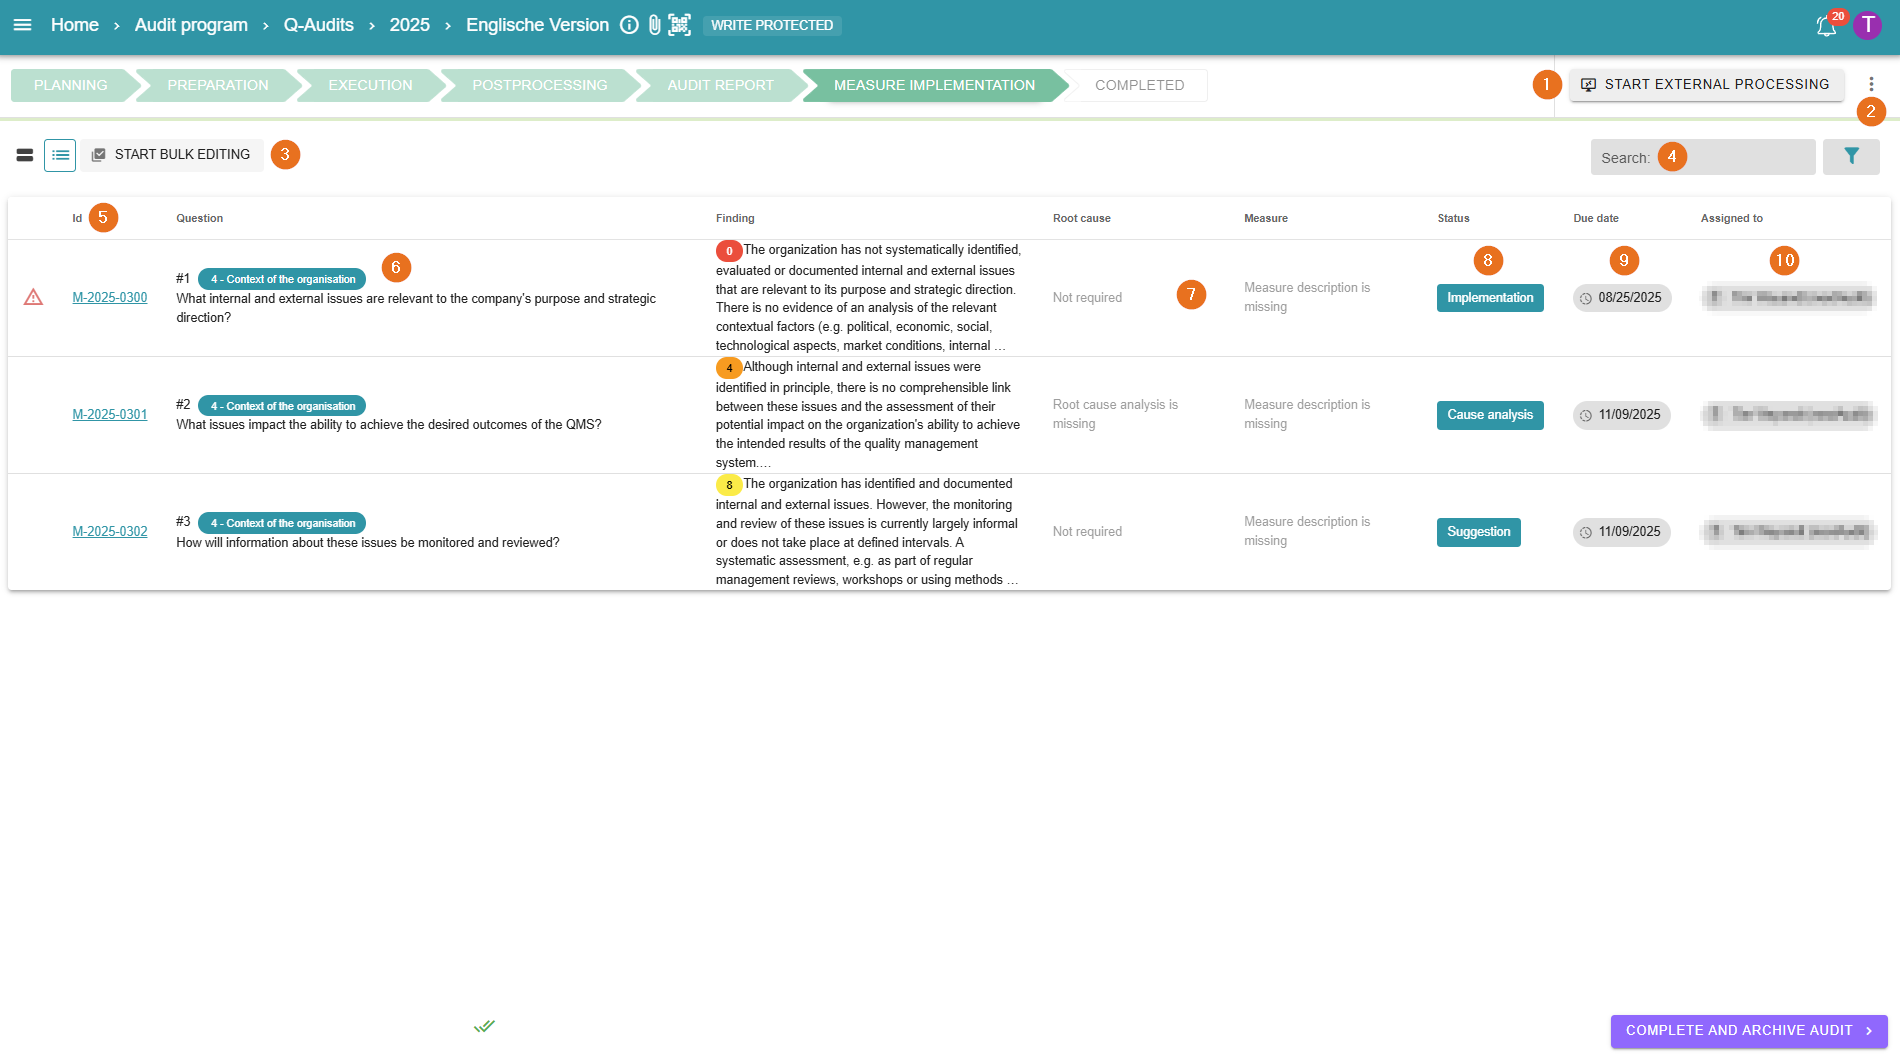
All measures from the audit are listed in the measure implementation. They are sorted by ID. Measures created first are also displayed first. The ID is a unique identifier – ideal for tracking the progress of your measures.
By default, a measure is assigned to the person responsible for the measure, as specified in the metadata in the Planning .
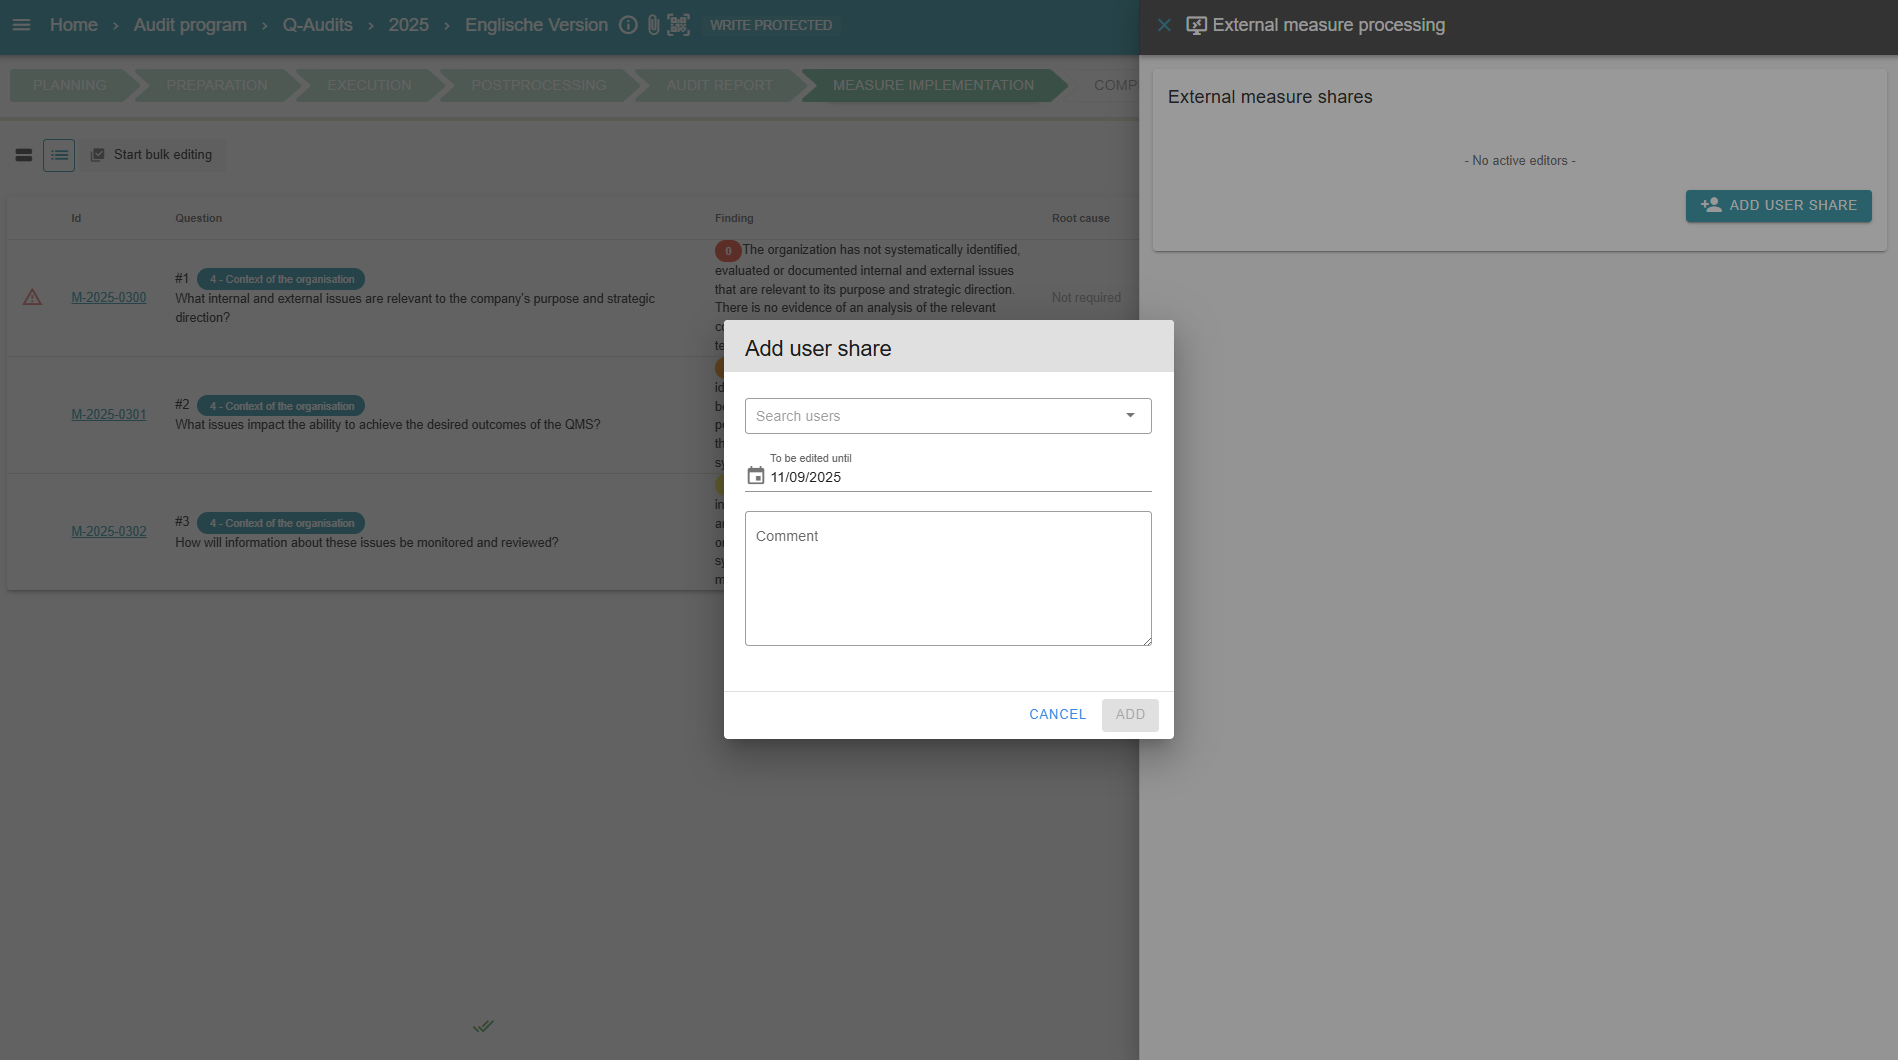
1 - Approve processing
Here, approval for external measure processing can be granted. At the same time, existing users can also be granted access to the measures.
It is possible to set a date by which the measures are to be processed and to write a comment.
2 - Export action plan
By clicking on the 3-dot menu, you can download the actionplan as a PDF file. This file lists all questions and their associated findings, causes, measures, effectiveness reviews and persons responsible for the measures.
Here you can also configure signature fields for e.g. the lead auditor, the person responsible for the measures and the supplier.
3 - Start bulk editing
In bulk editing, all or individual measures can be selected for editing or deletion. Clicking on “Edit” opens a sidebar where the assignment and date can be changed with comments, and text can be added to the transitions:
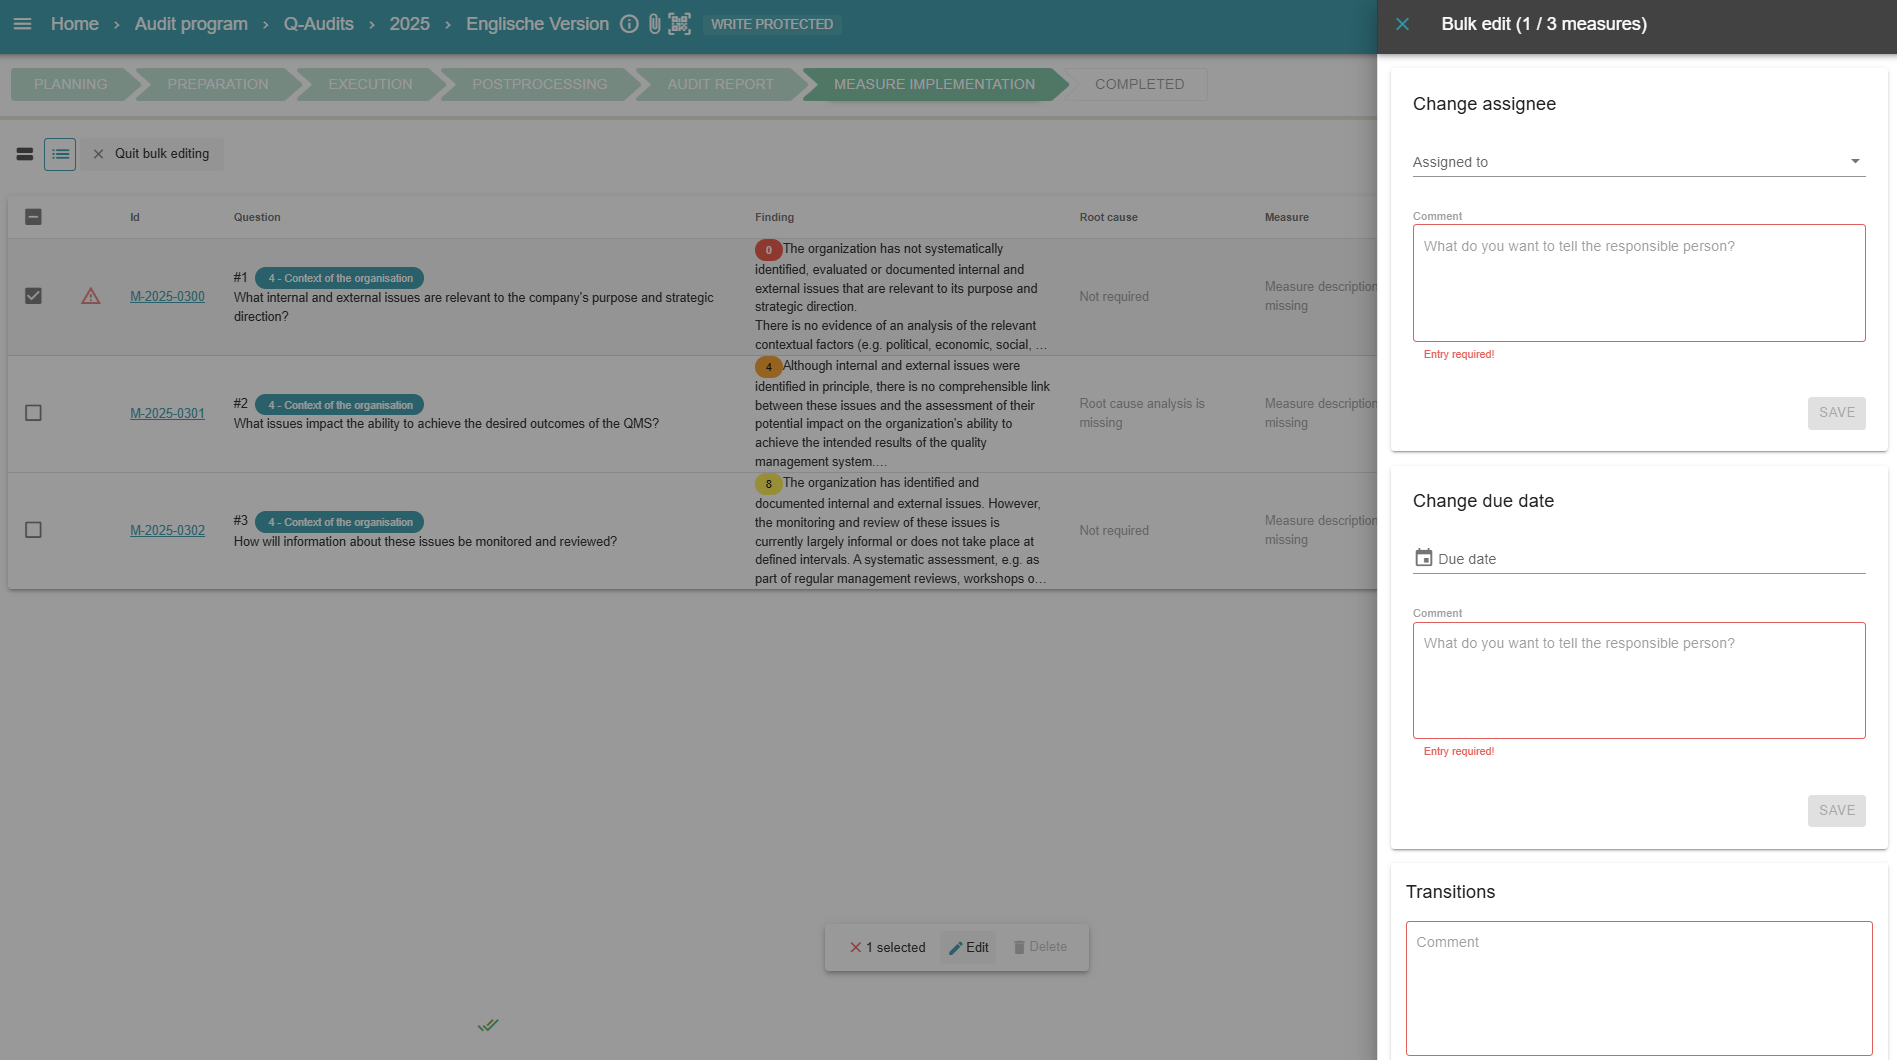
In this case, the text in red indicates that a comment to the assignee, a comment on the date and one on the transitions is required to save changes. This can, of course, be adapted to your needs.
4 - Search and filter measures
As already known from, for example, the audit execution using the function head , measures can be searched for via the text field or filter.
5 - Filter measures by ID
By clicking on “ID” in the top column, the measures can be sorted in ascending or descending order by their ID.
6 - Start measure implementation
The workflow for measures varies depending on the measure process. For example, an immediate action does not require a cause analysis but requires direct implementation. This can be seen in the root cause and measure description as well as in the measure status. If a red warning triangle appears next to a finding, this indicates that it is an immediate measure.
Clicking on one of the measures opens the measure editor for editing. For more information, see
The measure process/ measure editor .
7 - Cause and measure description
As already mentioned under start measure implementation , different steps are required depending on the measure process. Once the measures have gone through the corresponding steps/status, the results are displayed in these columns.
8 - Measure status
Here you can see the current status of the measure or how far its processing has progressed.
9 - Due date of a measure
The “Due date” column shows how much time is left before the measure must be implemented. In addition, colour coding is integrated. Overdue measures are marked in red. In addition, the measures are marked to indicate whether they are already due. Measures that are due soon are highlighted in orange. All other measures that are on schedule are displayed in green.
AuditCloud has an integrated reminder system. Emails can be sent for specific events in the measure process. By default, this is the case:
-
After the processing time has expired
-
One day after the deadline has expired
-
Periodically every 4 weeks thereafter (then also with escalation to the person responsible for the action
The notifications and their timing can also be freely configured on request.
10 - Person responsible for the measure
This column shows the user to whom the measure has been assigned. Both the due date and the person responsible for the action can be adjusted in the measure editor. More information can be found under The measure process/ measure editor .